


Unlocking an AML board over UART
AsicBoost · AML Unlock
How to Unlock an AML Board via UART
Enabling firmware rollback on Amlogic boards to install AsicBoost.
This is a guide to unlocking Amlogic (AML) control boards on Bitmain Antminer miners. On boards with stock firmware from September 2025 or newer, the firmware rollback via SD card is blocked. Below we show how to enable the board USB port over UART: after that you can downgrade the firmware via an SD image and install AsicBoost. The procedure is hardware-level and meant for experienced users.
Which models need unlocking
UART unlock is not needed for every miner, only for those that meet both conditions:
- an Amlogic (AML) control board;
- stock firmware from September 2025 or newer (FR 1.20+), where the SD-card rollback is blocked.
These are usually the newer models: Antminer S19 XP, S21 (and variants), T21, L9.
If you have an XIL, BB or CV board, or the stock firmware is older than September 2025, unlocking is not needed: the SD-image rollback and AsicBoost installation work directly. You can identify the board type in HashCore Toolkit while scanning the network or from the documentation.
What you will need
- An AML control board and a 12 V power supply.
- A Windows PC or laptop.
- A USB-UART adapter with installed drivers (for example, Silicon Labs CP2102).
- A terminal program to send commands (for example, PuTTY).
- Jumper wires (Dupont) to connect the adapter to the board pins.
- Tweezers or a thin screwdriver to short the JP2 jumper.
- An SD card with a stock image to downgrade the firmware after unlocking.
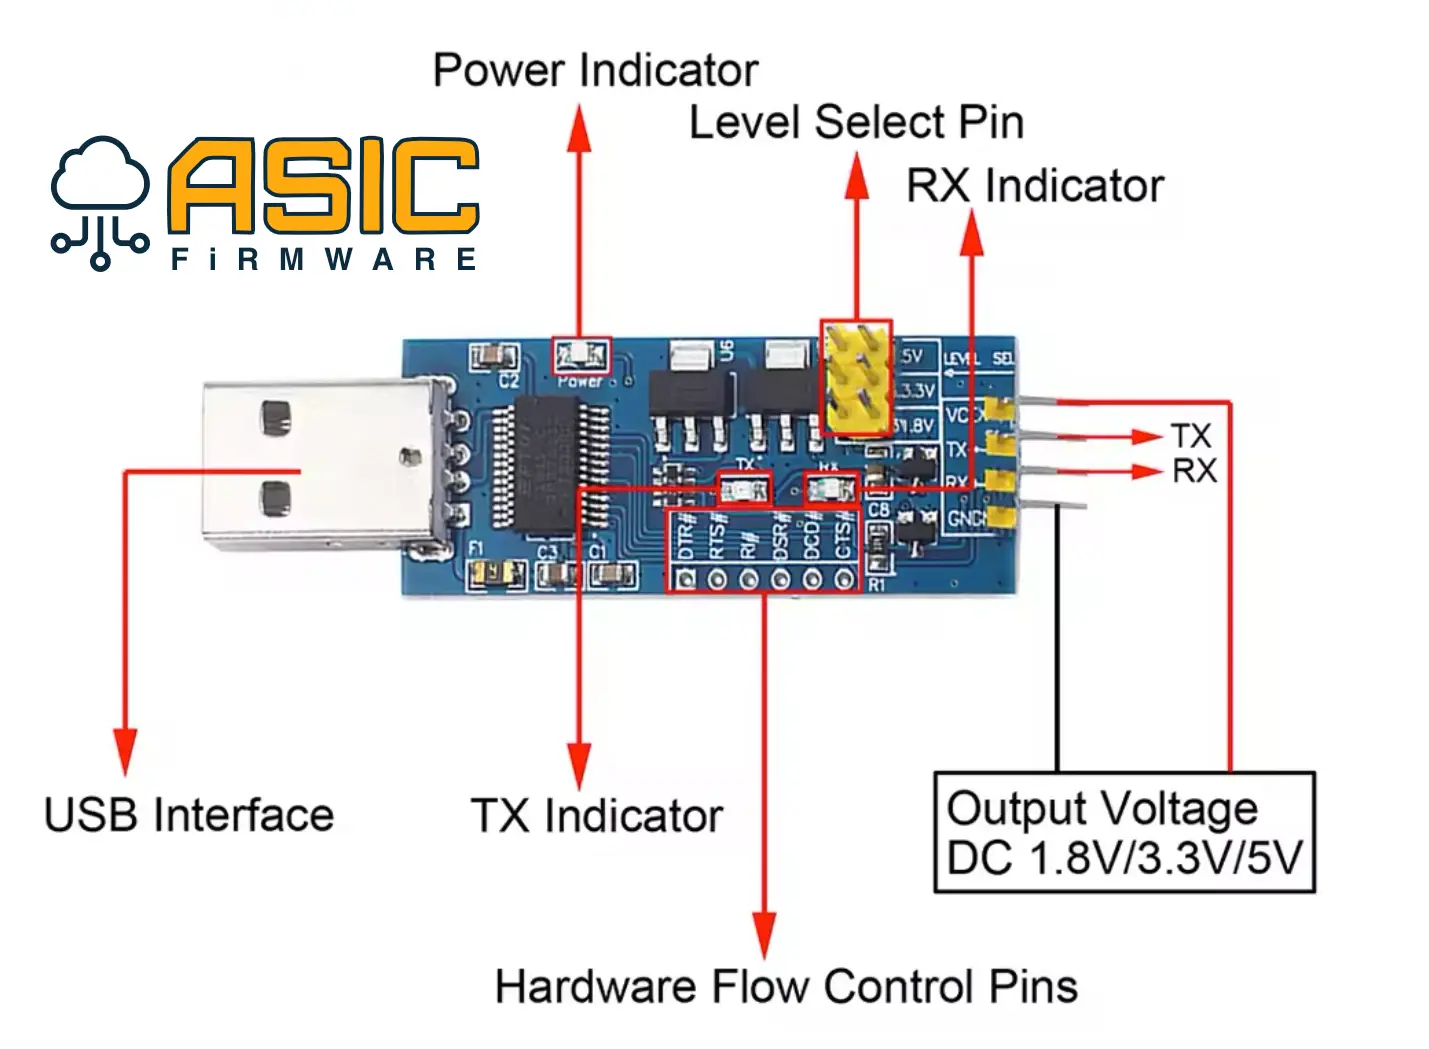
We only use TX, RX and GND, the other pins are not needed.
- Power Indicator: board power indicator
- Level Select Pin: not used; a jumper feeds the supply voltage to the Output Voltage pin
- TX Indicator: TX signal indicator
- RX Indicator: RX signal indicator
- Hardware Flow Control Pins: not used
Step-by-step unlock
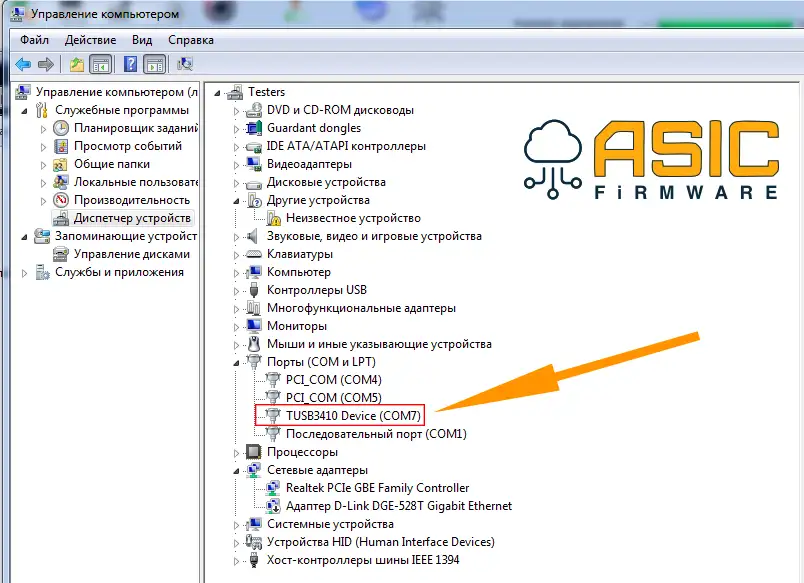
Connect the USB-UART adapter to the computer and check the assigned COM port number in Device Manager (for example, COM7).
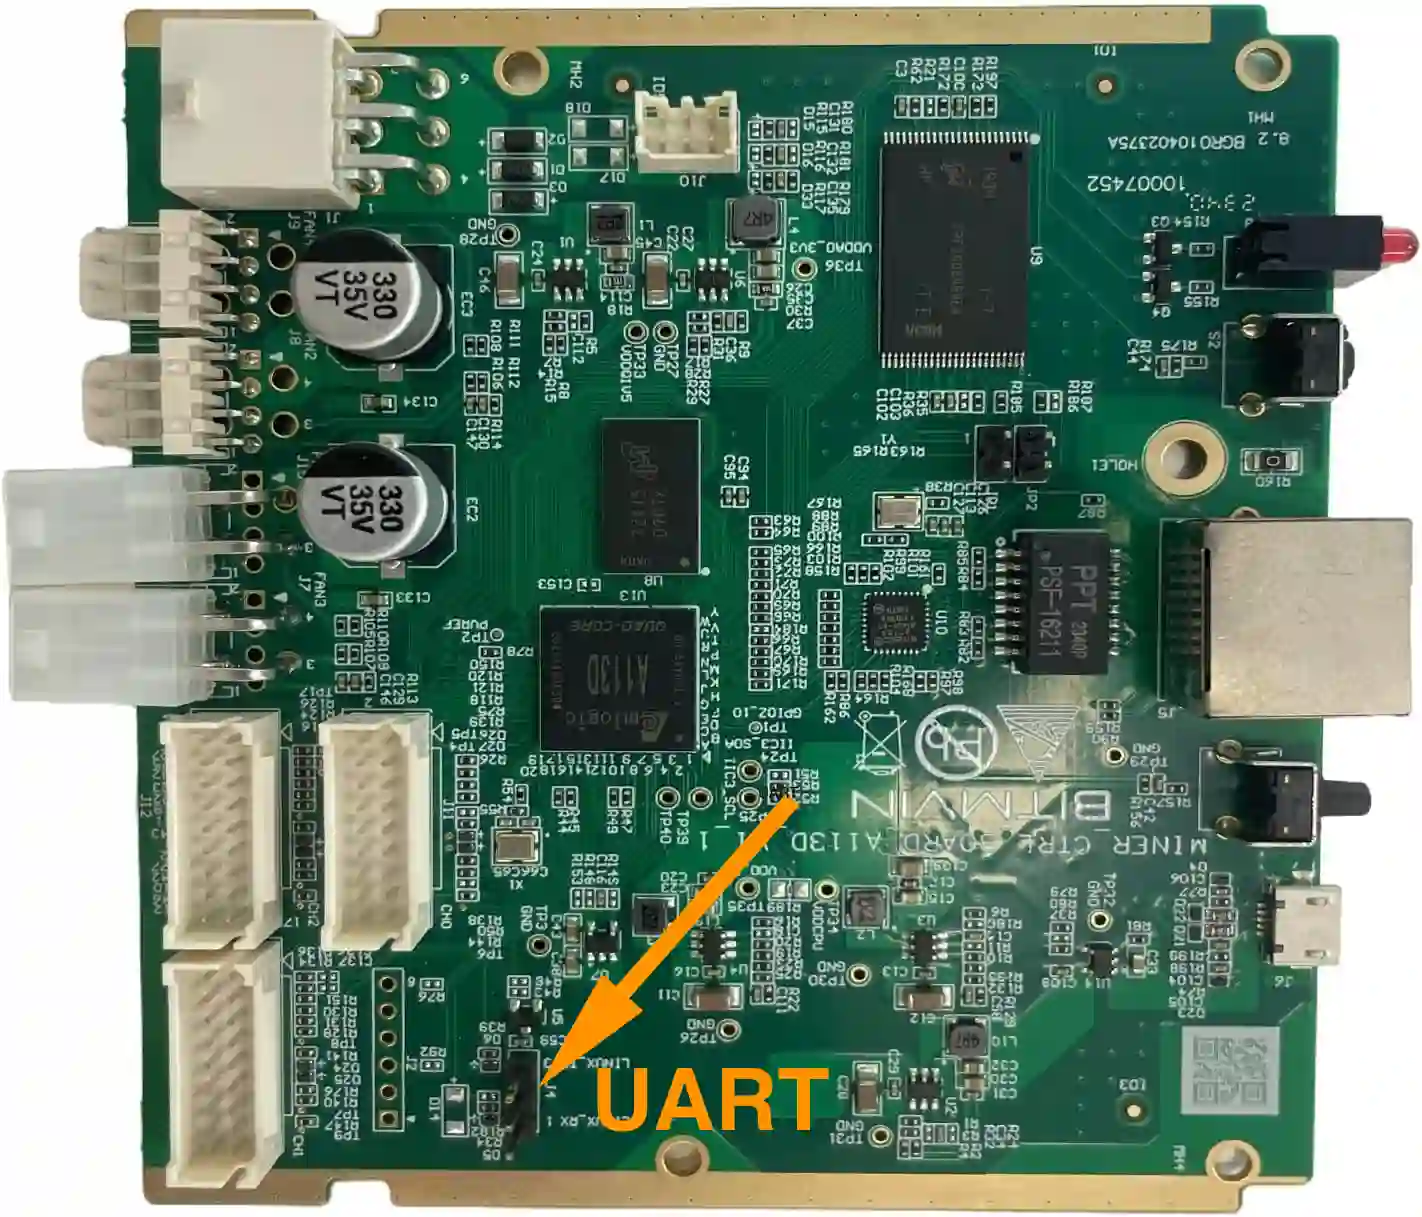
On the control board, find the service UART connector. It is usually a group of three pins labeled RX, TX and GND.
This connector is used for a serial connection to the board to view the boot log, run diagnostics and recover the device. Before connecting, make sure the pin markings are clearly readable to avoid mistakes when wiring the USB-UART adapter.
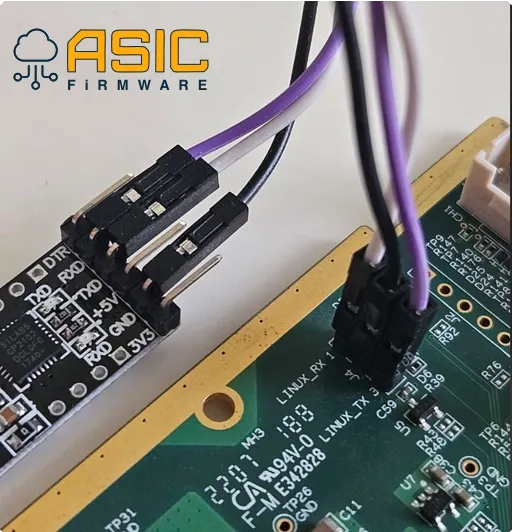
Connect the adapter to the board as follows:
- Adapter GND → Board GND (ground / common wire)
- Adapter RXD → Board TX (data transmit)
- Adapter TXD → Board RX (data receive)
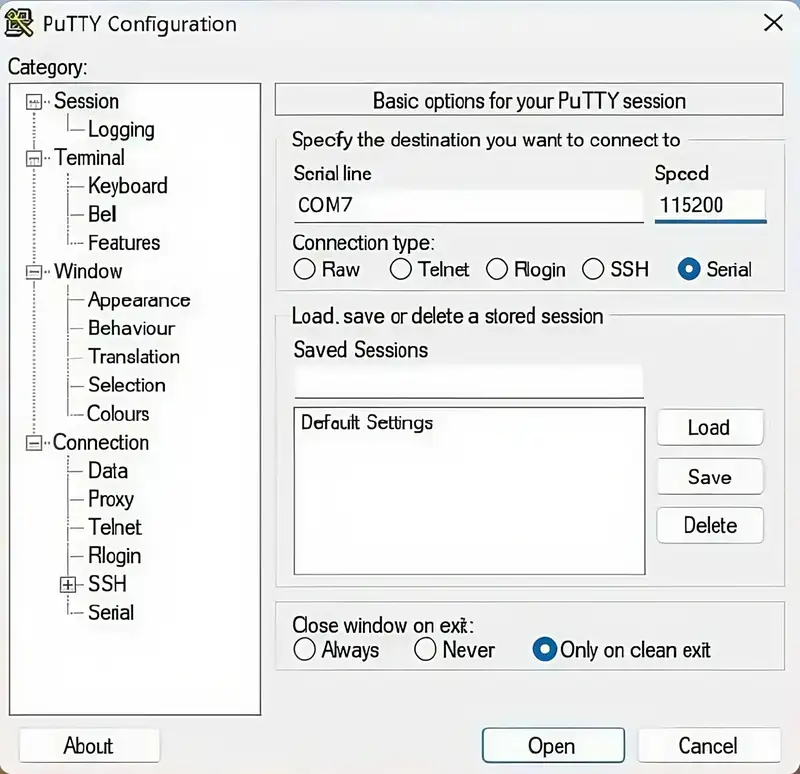
Launch PuTTY and set Connection type to Serial. Enter the COM port your USB-UART adapter is connected to, then set the speed (Speed / Baud) to 115200.
Leave the other parameters at their defaults:
- Data bits: 8
- Stop bits: 1
- Parity: None
- Flow control: None
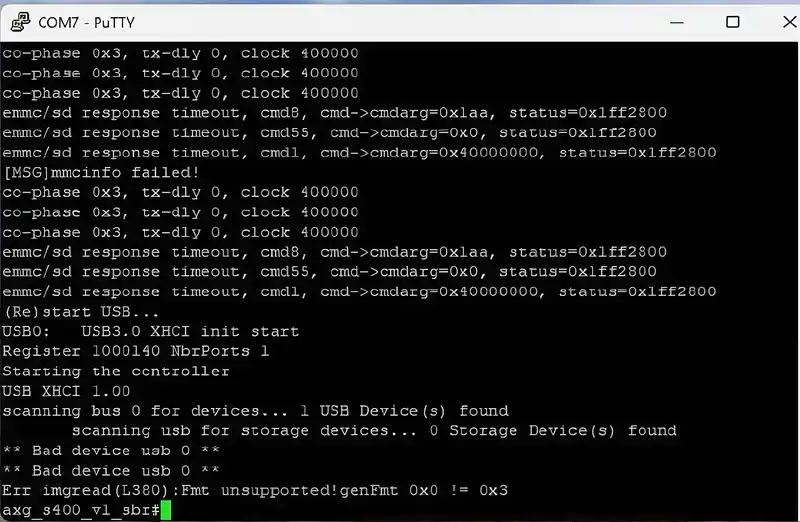
Power on the control board. A boot log should appear in the terminal, this confirms that the adapter is wired correctly and communication with the board is established.
During data exchange the TX and RX LEDs on the adapter will blink. This means data is being transferred between the adapter and the control board.
If the boot log does not appear or the TX/RX LEDs do not blink, check:
- the adapter is wired correctly;
- all connections are secure;
- the PuTTY settings (COM port, baud rate and other parameters).
Put the control board into recovery mode. To do this, fully disconnect its power, then find the JP2 jumper and carefully short its pins with a metal tweezer or a small screwdriver.
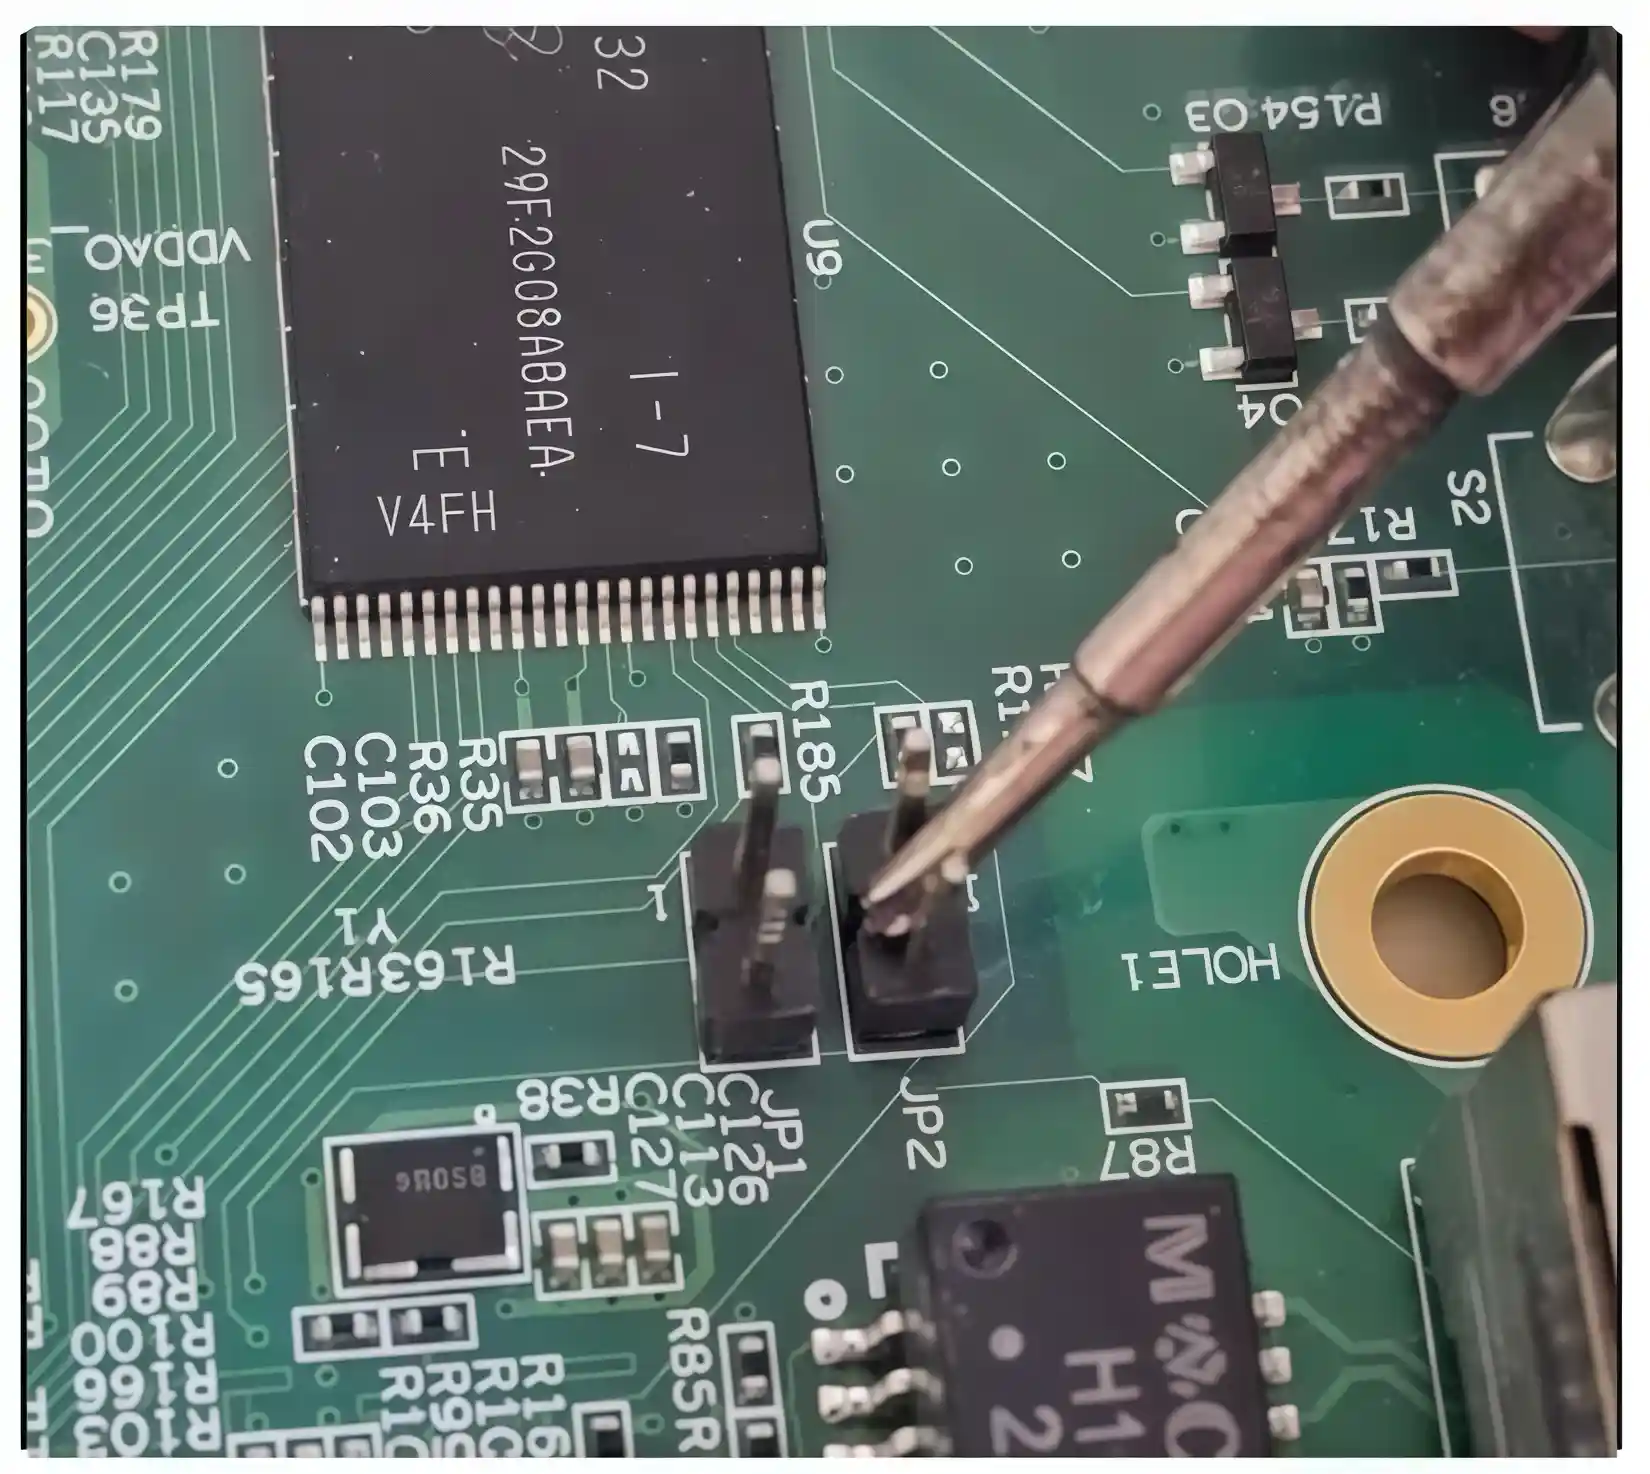
Make sure the PuTTY window is active, then power on the control board. Keep the JP2 jumper shorted until the first boot log lines appear in the terminal.
As soon as booting starts, release JP2 and immediately press the Space key several times. If done correctly, the automatic boot is interrupted and the board enters U-Boot (ENV) mode.
If U-Boot does not start, disconnect the power and repeat the procedure. During the next power-on, briefly short the JP1 or JP2 pins a few times to force an interruption of the boot and enter U-Boot.
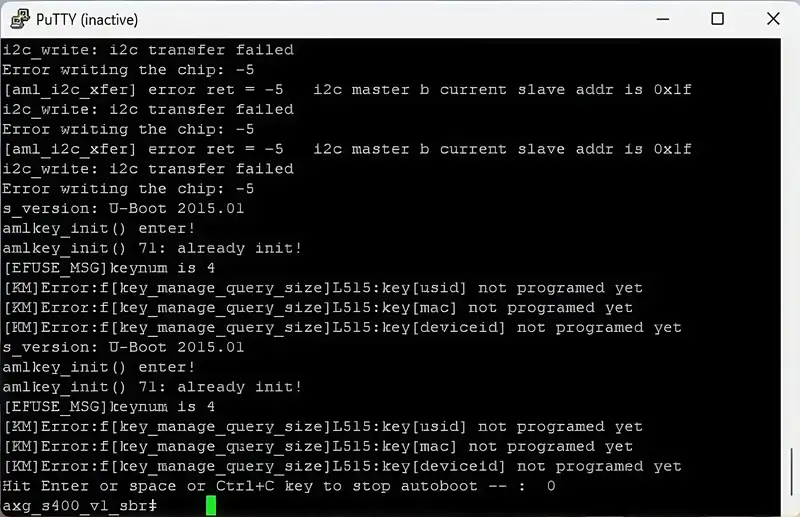
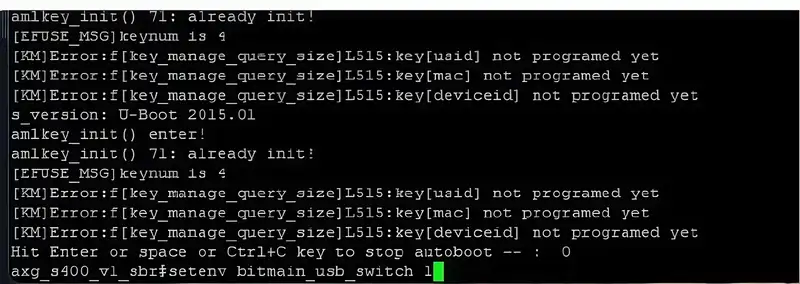
Type the command setenv bitmain_usb_switch 1 and press Enter. It enables the board USB port.
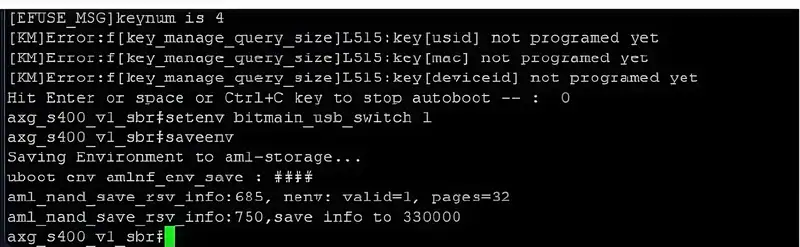
Type saveenv and press Enter to save the setting.
Reboot the control board so the changes take effect and the device boots normally.
After a successful reboot you can move on to the next stage:
- Downgrade the stock firmware version using a prepared SD image.
- Once done, install AsicBoost firmware following the guide for your ASIC miner model.
If all the previous steps were done correctly, the AsicBoost installation will go through without restrictions.
Video guide: Unlocking an AML board
If the port did not unlock
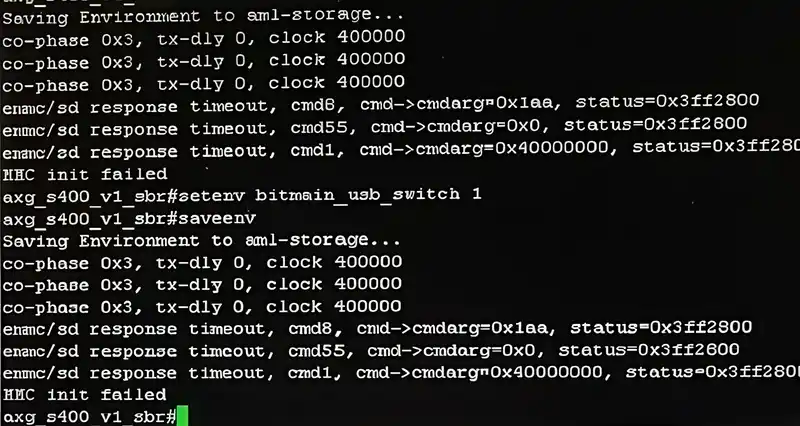
If the port did not unlock and the U-Boot command line is still shown in the terminal, run the following commands one by one. After each command press Enter and wait for it to complete.
saveenv
setenv bitmain_usb_switch 1
saveenv
After the commands run successfully, reboot the control board. On the next start the bitmain_usb_switch setting will be saved and the USB port should work in unlocked mode. If the problem persists, repeat the procedure, making sure all the previous steps were done correctly.
FAQ
Which miners need AML unlock?
Is unlocking mandatory?
Can it be done without UART?
Will it damage the board?
What settings to use in PuTTY?
What to do after unlocking?
Help
The board will not unlock?
Message support: we will tell you the pinout for your board, read the terminal output with you and help you get all the way to a working firmware. We answer in Russian, English and Spanish.